I was fed up to always type my passphrase when using git. I show you what modification you need to do in order to use the auto ssh-agent offered with KeepassXC.
First why KeepassXC ? In my point of view it is a far superior alternative to Keepass original client:
- multi-platform : Linux, Windows, MacOS
- Easy synchronization through any cloud services (Nextcloud Included)
- WebIntegration in firefox and other browser
- SSH agent automatic setup
Today we will mainly focus on the last point ! How to setup the SSH-agent in order to use it directly in GIT. It seems straightforward but actually, it is fairly buggy and need some annoying trick.
It is well better to setup a passphrase with your ssh key because in the case your private key get stolen nobody can use it without your passphrase, however it is really annoying to input the passphrase all the time. KeepassXC provide you with a tool that setup ssh-agent automatically when you unlock database.
KeepassXC setup
Mainly need to change some settings and to setup the entry that will contain the SSH-agent.
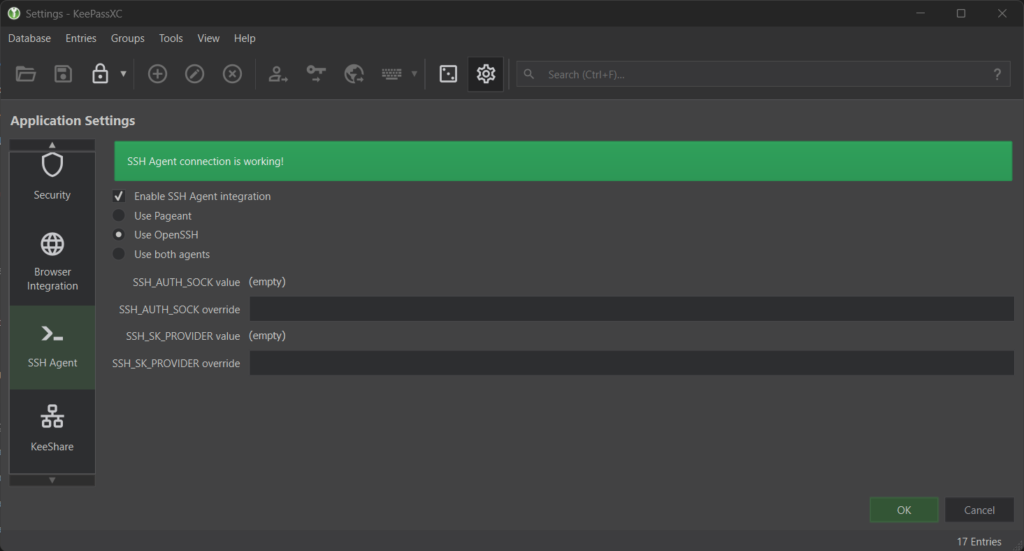
Settings
in Tools/settings search the SSH Agent tab. here you should only tick the Enable SSH Agent Integration and Use OpenSSH. Everything should directly be fine.
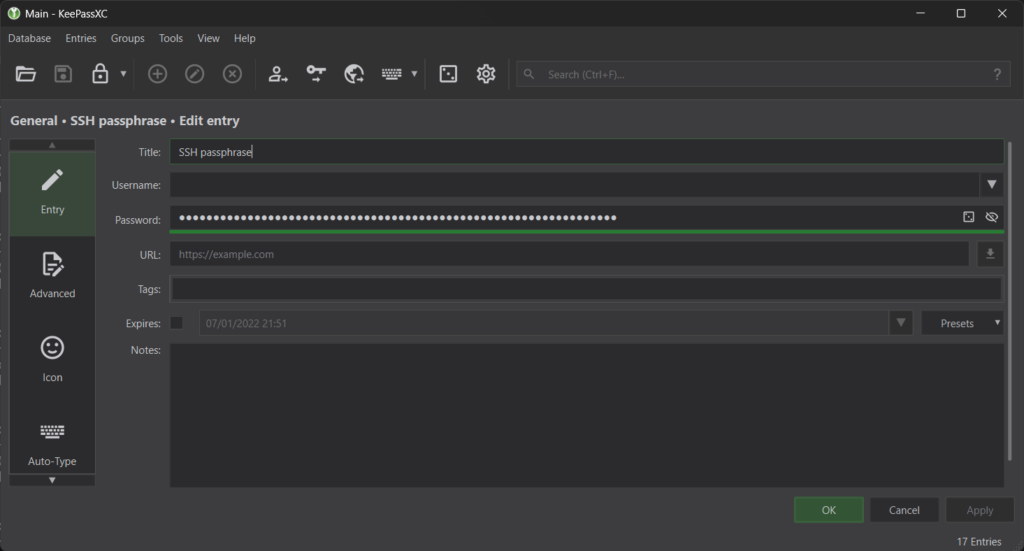
Entry setup
First in KeepassXC you need to create a new entry were you are going to paste the passphrase in the password field.
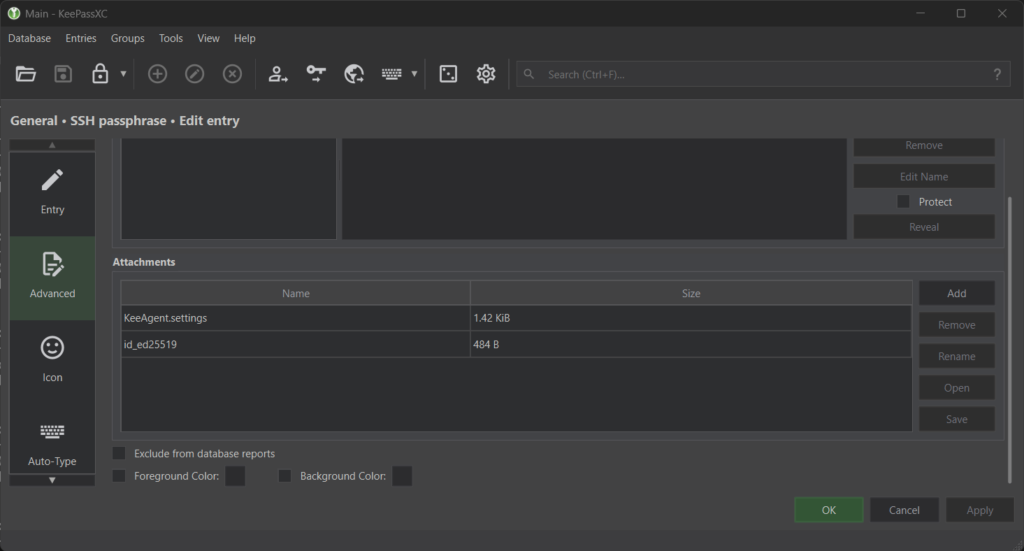
Now from the icon in the left you are going to search Advanced and add your private key as attachments. (This step is not mandatory please read the disclaimer above)
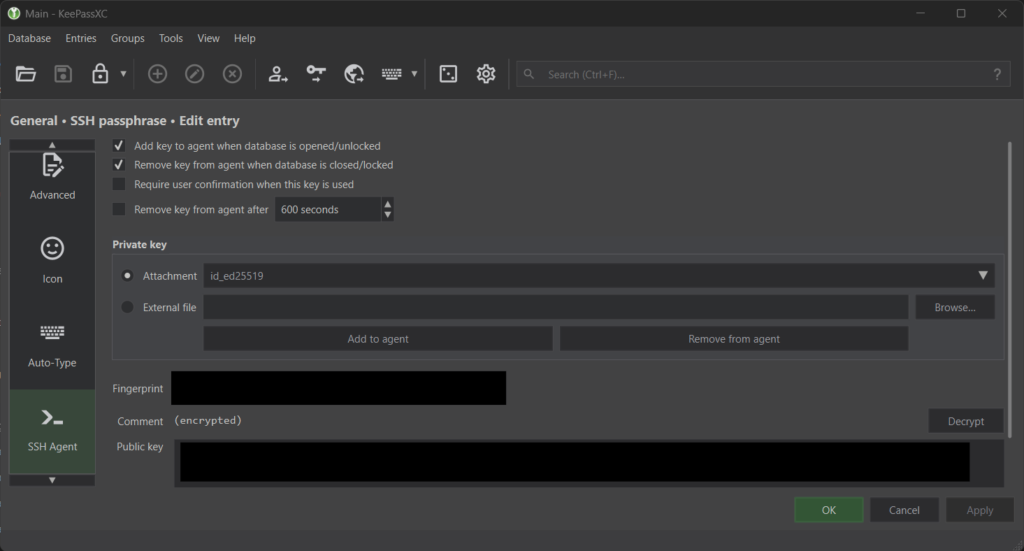
Final step, go into the SSH agent tab and select your attachment and tick what option you prefer for SSH agent. (for some key like this one I activate both automatic add and remove). You can check if everything is working by clicking on Decrypt
DISCLAIMER
As you may have seen from the step above you can either add the key as attachment or as external file. FOR MORE SECURITY, it is advised to use the key as external file because if your keepass database get stolen and open you will only loose your passphrase while the actual private key will stay on your computer.
GIT configuration
Git is an annoying boy in Windows, and it was in fact the most tricky part to make it work. Internet was not full of resources for this one.
Please directly modify your git config file (because of quote and other annoying path related stuff), it can be found in C:\Users\UserName\.gitconfig. Add the two following line in git in order to enable it to use ssh agent.
[core]
	sshCommand = 'C:\\Windows\\System32\\OpenSSH\\ssh.exe'
[gpg "ssh"]
	program = 'C:\\Windows\\System32\\OpenSSH\\ssh-keygen.exe'
You can check if it works by doing a git pull in any of your repository. You shouldn’t be prompted anymore for your passphrase.
Conclusion
That’s it for this super short tutorial ! Hope you found it useful, and that now you will use the full power of KeepassXC.
Leave a Reply